Fixed some problems with the blog

Ever since I performed an in-place upgrade from Windows Server 2008 Standard Edition to Windows Server 2008 Enterprise Edition on the server hosting this blog, I have been having problems when adding or edition content as my regular user. I would, for instance, try to create a new post or edit an existing one, the server would then return a white page with the words 403 FORBIDDEN. That was it. I tried Googling this error and installing some WSS hotfixes, but nothing resolved the problem. If I logged on as an administrator I could update and add content fine.
This situation finally became untenable so I decided to redo the WSS install. I first made a backup of the content database containing all the content from the sites. I then uninstalled WSS and the WSS language pack. Removed the Web Server Role. Removed the .NET Framework, Windows Internal Database, SMTP Server and Remote Administation Tools features. And finally, deleted the inetpub directory.
I reinstalled all the above software, roles and features and restored the content database. I had to redo all the configuration because I did not want to restore the configuration database. But luckily that was not too much work.
Now the error seems to be resolved, so you can look forward to a few more postings in the future.
Here are a few of the postings I have planned:
  • Using Wireshark network analyzer to decipher SSL traffic.
  • Configuring ISA Server 2006 to publish Outlook Anywhere using Kerberos Constrained Delegation. (Judging by the amount of spam comments on the first post on this topic, this should be popular.)
  • A few more I can’t remember right now

Specify a blank sender in SMTP communication using a Telnet client

If you ever need to specify a blank sender in the mail from command when debugging an SMTP server by using a Telnet client; use <>.
For example:
220 mta.domain.com Microsoft ESMTP MAIL Service ready at Mon, 22 Dec 2008 23:21:41 +0100
ehlo
250-mta.domain.com Hello [10.10.10.10]
250-SIZE
250-PIPELINING
250-DSN
250-ENHANCEDSTATUSCODES
250-STARTTLS
250-X-ANONYMOUSTLS
250-AUTH NTLM
250-X-EXPS GSSAPI NTLM
250-8BITMIME
250-BINARYMIME
250-CHUNKING
250-XEXCH50
250 XRDST
mail from:<>
250 2.1.0 Sender OK
This has been tested on Microsoft Exchange, maybe other mail servers will not accept it.
Update: I have recently discovered that the <> combination can be used in other SMTP verbs as well. For instance to specify that you do not want to authenticate you could send the command AUTH:<>

How to reinstall Virtual Server 2005 Virtual Machine Additions

The GUI insatller (setup.exe) for the Virtual Server 2005 Virtual Machine Additions do not offer a reinstall or repair option. That means that if you ever experience any problems with any of the additions you are forced to first remove the additions, reboot, reinstall them and the reboot again. But if you use the MSI directly with msiexec.exe instead of setup.exe you have some more options. This command will reinstall the additions on your virtual machine:

Msiexec.exe /faums VirtualMachineAdditions.msi

You need to mount the Additions.iso file and change to the Windows directory in the ISO image.

More info about msiexec.exe parameters here: http://technet.microsoft.com/en-us/library/cc759262.aspx

What are the security benefits of running a service as the Local System Account as opposed to a user account?

With the release of Windows 2000 products from Microsoft, most prominently Exchange 2000, started running their services under the Local System1 account instead of using a dedicated Active Directory User account, or what is commonly known as a service account2. The reason for this was security. As time passed more and more products adapted this approach and now most products do, at least from Microsoft. A result of this is the widespread use of computer objects in Active Directory to grant permissions. The Local System account act as the host computer account on the network and as such has access to network resources just like any other domain account. On the network, this account appears as DOMAIN<machine name>$. Instead of granting permissions to the service accounts, who were typically Domain Admins, we now grant granular permissions to the computer object where the service is running. When the service on the computer accesses e.g. Active Directory it does so at the host computer account and because that computer now has rights and permissions it can access the necessary data. But why is this configuration more secure? Well, that’s what this post will try to answer.

  • Password changes
    A traditional service account (user account) typically had the User cannot change password and Password never expires settings set. This meant that you set the password of the account when you created it and never changed it afterwards. That is not a good security practice. Computer accounts on the other hand are also members of Active Directory and change their password on a regular basis, completely automatic. By using the computer account for your services you get regular password changes for your services.
  • Granular permissions
    Traditional user service accounts were usually added to the Domain Admins group. This facilitated easy access to all resources and the services always worked. If the service account, which could be used on several and sometimes all, computers on the network was ever compromised it would give an attacker virtually unlimited access to the network. By using Local System the account can only be used on the host computer and typically never have any rights on other systems. Furthermore, using the principle of least privilege, the host computer’s account can be given only the necessary permissions required to run the service.

1 Local System, or NT AUTHORITYSYSTEM which is its actual name, is a predefined local account that can start a service and provide the security context for that service. When you run something, a service, a scheduled task or a process as Local System you are running it as the host computer. This has many benefits. For example the system has access to the entire computer, meaning the local SAM, Session 0, and other protected areas which are not immediately accessible to a user, even an administrator. For an administrator to access these protected areas we have to start a process as Local System, which is something only administrators can do. There are also other accounts which represent the system, namely LocalService and NetworkService. LocalService has reduced privileges similar to an authenticated local user account, and operate on the network using a NULL sessions (anonymous). NetworkService also has reduced privileges similar to an authenticated user account, but accesses network resources using the credentials of the computer account in the same manner as a Local System service does. More information about service accounts etc is available in the Services and Service Accounts Security Planning Guide (http://www.microsoft.com/technet/security/guidance/serversecurity/serviceaccount/default.mspx).

2 What allowed this was a change in the Local System Account which enabled it to authenticate to network resources just as a regular user account.

Troubleshooting Outlook Anywhere (Outlook RPC-over-HTTPS)

This is an unordered list of tools and functionality that is handy when troubleshooting Outlook Anywhere or Outlook RPC-over-HTTPS as it was previously known.

  • Wireshark
    Excellent network protocol analyzer, use it to see what Outlook and Exchange send over the wire. It is possible to configure Wireshark to decrypt an SSL stream, I will post a how-to about this soon.
  • Outlook Debug Logging
    Enable from ToolsàOptionsàOtheràAdvanced Options…àEnable logging (troubleshooting)
    This will generate log files in the user’s temp folder as well as events in the Event Log.
  • Outlook Connection Status/Test E-Mail AutoConfiguration…
    Access by right clicking the Outlook icon in the system tray/notification area while pressing CTRL.
    In the Connection Status window you can see server names, connection types, network interface, protocols, status and statistics. Also you can view the activity in your local mailbox. The Test E-Mail AutoConfiguration option shows you all the information delivered by the Autodiscover web service.
  • Outlook RPC diag
    Start Outlook with the command line parameter /rpcdiag, eg. outlook.exe /rpcdiag. This brings up the Connection Status box.
  • IIS Log files
    Usually located in your inetpub directory these files show you the requests that you web server receives, as well as the return codes the server responded with.
  • Windows Event Logs
    Look here for errors from the web server or Outlook, or any other component associated with Outlook Anywhere functionality.
  • Test-OutlookWebServices cmdlet
    This cmdlet runs a test on the Autodiscovery web service and outputs the results.

Morgan

Determining free space in Exchange Mailbox Databases using PowerShell

Exchange Mailbox Databases (EDB files) increase in size automatically when required, but they never decrease in size without administrator intervention. Exchange does its best to use up the free space inside the database, the so called white space, but that is not always possible. Because of this you are left with database files that just continue to increase in size as data is added to them, even if a fair amount of free space is available inside the database file. So sometimes you have to take the database offline and manually defragment it using eseutil.exe. By doing this your databases will be defragmented and a new file created which does not have any white space in it. This new file will be automatically moved to the location of your old file that will be deleted. So how do you determine when it is time to defragment your databases, and how do you know how much your files will decrease in size?

The first question is up to you to decide but the second can be easily answered by a PowerShell cmdlet:

Get-EventLog -LogName Application -New 1024 | where { $_.EventID -eq 1221 -and $_.TimeGenerated -ge [DateTime]::Now.AddHours(-24) } | ft TimeGenerated,Message -Wrap -auto

I also have a script that does some formatting of the results, making it easier to export to CSV or XML e.g.

   1: $colResults = @()

   2: $events = Get-EventLog -LogName Application -New 1024 | where { $_.EventID -eq 1221 -and $_.TimeGenerated -ge [DateTime]::Now.AddHours(-24) }

   3: $events | ForEach `

   4: {

   5:  $objEvent = New-Object System.Object

   6:  $objEvent | Add-Member -type NoteProperty -name Date-Time -value $_.TimeGenerated

   7:  $objEvent | Add-Member -type NoteProperty -name Database -value $_.ReplacementStrings[1]

   8:  $objEvent | Add-Member -type NoteProperty -name "Free Space (MB)" -value $_.ReplacementStrings[0]

   9:  $colResults += $objEvent

  10: }

  11: $colResults | Sort-Object Database | ft -autosize

Happy defragmenting!

Turning on BitLocker on my laptop

So I decided to test BitLocker on my laptop. Here is what happened.

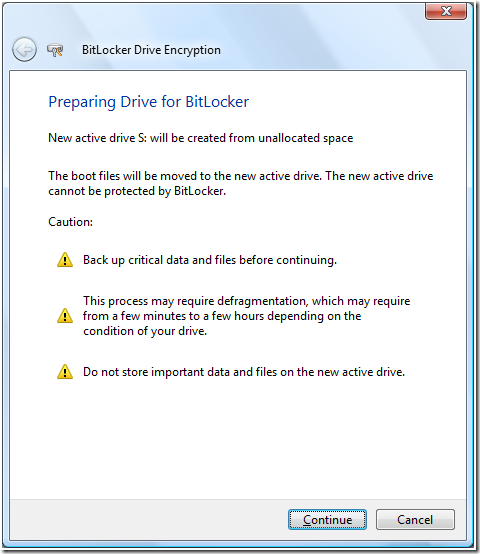
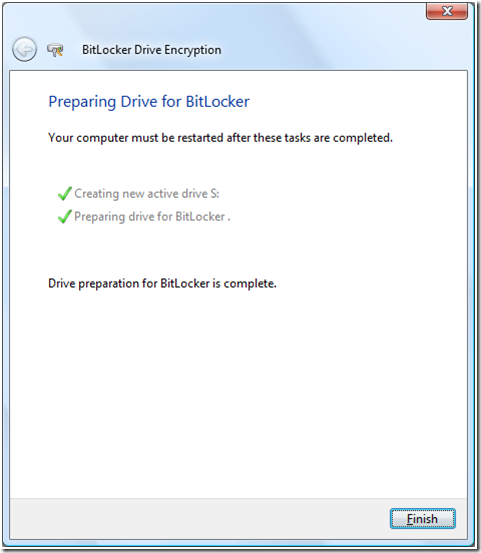
First you need to have the correct partition layout; one 1,5 GB unencrypted system partition to store the boot manager and the Boot Configuration Database (BCD). The BitLocker Drive Preparation Tool does this for you, BDPT is documented in KB933246.

BDPT did not work on my system initially because of a hidden EISA Configuration partition courtesy of Lenovo. So that had to go first. The EISA partition could not be deleted from Disk Management so I had to use the delete partition override command in diskpart to get rid of it. The EISA partition was 5GB, but I only neede 1,5 GB, so I extended the C: drive until only 1,5 GB free space remained. The I tried the BitLocker Drive Preparation Tool again:

 102308_1838_TurningonBi1

Figure 1 Warning screen

 102308_1838_TurningonBi2

Figure 2 Creating new partition

 102308_1838_TurningonBi3

Figure 3 Moving the boot manager and BCD to the new partition

 102308_1838_TurningonBi4

Figure 4 Process complete

 102308_1838_TurningonBi5

Figure 5 Restart message

Meeting Steve Ballmer

Steve Ballmer (CEO of Microsoft for all you people who have been living under a rock for the last 20 years) visited Oslo on the 30th of September and I was lucky enough to meet him and take part in a quick photo shoot. (I’m number three from the left on the back row.)

101208_2210_MeetingStev1

Steve gave a 40 minute talk which was quite interesting. You can see the entire talk on YouTube here:

Part 1: http://www.youtube.com/watch?v=M1VKQIjsvpQ
Part 2: http://www.youtube.com/watch?v=QACnK1AucTY
Part 3: http://www.youtube.com/watch?v=hs4sASuPQpQ
Part 4: http://www.youtube.com/watch?v=0y1OeXTs2zM

You can read more about Steve here:

Wonder if I will ever meet Bill Gates?

Morgan

‘Remove Exchange Attributes’ á la PowerShell

The extensions to Active Directory Users and Computers for Exchange 2000 and Exchange 2003 have a task called Remove Exchange Attributes that is accessible from the Exchange Tasks menu. It removes all Exhange related attributes from the objects on which it is run. This is useful when an object is in an inconsistent state, as regards to Exchange. For example if an Exchange attribute has invalid data or not all required attributes are present.
If you remove the last Exchange 2000/2003 server from your organization you will not be able to use the Remove Exchange Attributes task, even if the extensions are still installed on a computer. I recently found myself in just that situation and had to come up with a workaround. My favorite tool lately is PowerShell so I decided to use that. This is the command I came up with, using the cmdlets from Quest Software for Active Directory:

https://gist.github.com/morgansimonsen/8040285

As you can see, this command targets groups, but it can be easily changed to apply to other object types.
I found a list of all the Exchange attributes that the Remove Exchange Attributes task removes here: