Packer for Azure Peculiarities

Building images on Azure with Packer I have discovered some things that might be useful to others:

Cannot locate resource group means something else

Error when doing Azure Managed Disk builds:

Build ‘azure-arm’ errored: Cannot locate the managed image resource group <your RG>

What Packer really means is that your credentials are wrong. Check your values for client_id and client_secret. Remember that it is the Application ID that is your client_id, not the name or the object ID.

full access to this subscription” is not really necessary

The Packers docs state:

“The service principal specified in client_id must have full access to this subscription, unless build_resource_group_name option is specified in which case it needs to have owner access to the existing resource group specified in build_resource_group_name parameter.”

First of all; “full access” is not the name of a role in Azure IAM. Since they go on to mention “owner”, which is a role, later on when discussing the use of a pre-existing resource group, I assume that owner is what they mean. But the Packer service principal does not need owner. It just needs permissions to perform the creation and deletion of resources at the right level. Contributor works fine.

Remember thy OS

Packer commands must use double quotes on Windows and single quotes on Linux. Simple, right? Yet so hard to remember.  AFAICT this is mentioned only once in the Packer docs, in the Intro section, but not in the Template User Variables section. Even the help output of packer.exe (1.2.) on Windows is wrong:

 -var 'key=value' Variable for templates, can be used multiple times.

Will work on Linux, but not on Windows:

$ packer build \
 -var 'aws_access_key=YOUR ACCESS KEY' \
 -var 'aws_secret_key=YOUR SECRET KEY' \
 example.json

Will work on Windows, but not on Linux:

PS> packer build \
 -var "aws_access_key=YOUR ACCESS KEY" \
 -var "aws_secret_key=YOUR SECRET KEY" \
 example.json

Windows images require client_id and object_id

The object_id configuration option is not listed under the required section of the Azure builder, but if you are building a Windows image it is in fact required. This is explained in the object_id explanation, but should be made more clear. After all, if object_id is missing; Packer will not tell you that. Rather it will give you this:

==> azure-arm: ERROR: -> BadRequest : An invalid value was provided for ‘accessPolicies’.

object_id takes as its value the actual object id of the service principal that Packer is using. So client_id needs the application id and object_id needs the object id. What seems strange to me here is that Packer already knows the application id of its service principal and could easily get the object id from that by querying the graph. This is turn could make the whole issue with providing object_id redundant. Packer could just figure it out. This issue is discussed more in this link. If you have the wrong value in object_id you might see this error:

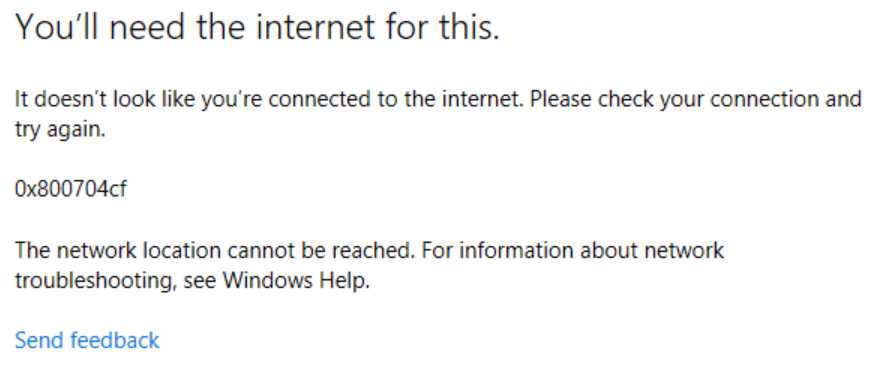
Failed to fetch secret from <KV Name>/packerKeyVaultSecret, HTTP status code=403 (Forbidden)

This is because Packer uses the value provided for object_id in the KeyVault access policy, which is accepted by the Azure ARM API (after all, it is just a GUID), but does not work in the next step when Packer tries to retrieve the value of the secret. Again, the solution is to set the correct value for object_id. People talk more about this issue here.

Happy Packing!

Migrating blog database from ClearDB to Azure DB for MySQL

Introduction

All of us running our blogs on WordPress have some knowledge of MySQL, which is WordPress’ database back-end. I run my WordPress blog (the one you are reading now) in Azure App Service. We used to be able to create MySQL databases in the Azure portal directly. This was made possible through a partnership between Microsoft and ClearDB. Providing an offering running MySQL in Azure datacenters, but managed by ClearDB. You could see and manage your MySQL resources in the Azure portal, and even pay for your MySQL usage with your Azure credit. This option disappeared some time ago, at which time we all had to start managing our MySQL databases from the ClearDB management portal. At the same time the MySQL resources disappeared from the Azure portal. Since H2 2017 Azure DB has been able to natively support MySQL. This is now a native Azure resource on the same level as regular Azure DB MS SQL. With this new offering I can once again run, manage, and pay for, all my blog resources on Azure. This posts shows how I migrated from ClearDB MySQL to Azure DB for MySQL.

Migration

The steps I followed are available here, and I will not repeat them:

https://azure.microsoft.com/en-us/blog/cleardb-migration-to-azure-database-for-mysql/

There are a few things I did differently.

Database Pricing Tier

I selected the smallest possible database SKU; 1 vCore and 5 GB memory. This seems to be adequate for the traffic my site is receiving.

Database Connection

The Connection strings, under Application settings in the App service did not seem to do anything. After I changed it I started receiving “Error connecting to database” messages in my browser. WordPress stores its database connection settings in wp-config.php, and you need to edit this file. I recommend Kudu. Wp-config.php is in the wwwroot folder. You need to restart your app service after you change it. You will find Kudu under Advanced Tools in your App service. The values you need to change are:

  • DB_USER
  • DB_PASSWORD
  • DB_HOST

Connection Security: Firewall

I recommend to follow the Microsoft blog post author’s setup of allowing only the outbound IP addresses of your Azure App Service in your database firewall rules. You might be tempted to enable the option Allow access to Azure services in the firewall setup, but I recommend against it. This setting allows connections from all Azure public IPs, not just the ones you use. This can potentially open you up to denial of service or other attacks from malicious actors who are also using Azure. If you do decide to use this option, set a good password and monitor your database for connections from IPs you do not use.

Connection Security: SSL

The Microsoft blog post author disables SSL Enforcement on his database, but I wanted to keep that enabled. My WordPress setup did not have the required settings to allow this so I had to add the following to my wp-config.php file:

define( 'MYSQL_CLIENT_FLAGS', MYSQLI_CLIENT_SSL | MYSQLI_CLIENT_SSL_DONT_VERIFY_SERVER_CERT );

This will add the flag to use SSL for database connections and also turn off verification of the database certificate. With this added to my WordPress config I could enable Enforce SSL connection for my database.

I have seen some posts on Server Fault about how using SSL between your front-end and database impacts performance. I have yet to see some detrimental effects of this setting, but will monitor it in the coming days and update this post with my findings, if any.

Azure DB MySQL databases use public certificates signed by DigiCert. More information about SSL support is available here:

https://docs.microsoft.com/en-us/azure/mysql/howto-configure-ssl

This would suggest that I did not need to disable verification of the database server certificate. I want to investigate if I can disable that setting and have certificate validation enabled. More to come on this topic.

There is also a WordPress plugin to handle database SSL connections.

Conclusion

The database migration was very quick. The site seems to be running fine, and I have yet to find any issues. Please sound off in the comments if you experience anything wrong or strange in the coming weeks. I plan not to make any more changes in the immediate future to make sure any issues are related to the database migration and not something else I did. When all is fine I will delete my ClearDB database. Thanks for reading!

/M

But I _am_ on the Internet!

For some time I have had some strange symptoms on Windows 10 systems when they were accessing the Internet over a VPN connection. In my case the VPN provider was TigerVPN. This issue is unrelated to the provider, but is instead caused by the Windows networking stack when used with the OpenVPN software (which many VPN providers use). More on that later, first let’s explore the symptoms.

In my case the problem manifested itself in many different ways, but it seems they all stem from the inability to sign in to Microsoft Accounts (MSA) when the VPN connection was active.  For example the Microsoft Store app did not work and I was constantly informed that I needed the Internet to do what I wanted to do (hence the title of this article). This was the error the Store gave me;

You’ll need the internet for this.

It doesn’t look like you’re connected to the internet. Please check your connection and

try again.

Ox800704cf

The network location cannot be reached. For information about network

troubleshooting, see Windows Help.

Hitting the “Send Feedback” button would open the Feedback Hub app , which would be stuck at an endlessly looping “Let’s get you signed in” screen. Very helpful…

Other problems include, but are probably not limited to, not being able to change your Windows Insider settings and issues with the Xbox app. All other network operations that I tried worked fine, but there could also, of course, be other issues.

So why did this happen?

It turns out that OpenVPN supports IPv6 connections inside the tunnel by default since version 2.3.0. This is good, we all like IPv6, but not all VPN providers support it on their servers, which is also fine. But not forever, and not without telling you. Windows 10 (and all versions since Vista) also support IPv6 by default and has a dual IPv4/IPv6 stack that will try to use both protocols simultaneously. In addition, Windows also has a number of IPv6 transition technologies built in. This is also good. If everything supported IPv6 through the entire stack and connection these problems would not present themselves. But this time that was not the case. My VPN provider did not support IPv6 and had it turned off. (I am unsure of how, exactly, they disabled IPv6 but I see the message did_ifconfig_ipv6_setup=0 every time I connect and take that to mean that IPv6 has been disabled either as a setting pushed by the server or in the client config file (.ovpn). But Windows did not know that IPv6 was disabled in the OpenVPN software so the tunnel adapter that OpenVPN creates still had IPv6 enabled. So Windows thought that the connection supported IPv6, but it did not. This is usually not a problem. When I looked in network connections this is what I saw:

The TAP adapter (Ethernet 2) is the OpenVPN software tunnel adapter. As you can see the Connectivity status is listed as “No network access”, but network access was working fine except for the issues mentioned. The properties of the adapter looked like this:

Notice that the IPv6 protocol is enabled. When I disabled IPv6 on the adapter, and thus making the connection pure IPv4, the Connectivity status immediately changed to “Internet access”, and all problems were resolved. And there was much rejoicing…

I can’t say exactly what caused this issue to arise. After all, having IPv6 enabled on adapters that are connected to IPv4-only networks works fine. I suspect this has something to do with one of IPv6’s transition technologies, Teredo, 6to4, ISATAP or PortProxy, but I did not investigate this further. This is a case where I am happy to accept the empirical fact that turning off IPv6 resolves the problem.

I have not seen any negative effects of this “fix”. My VPN provider does not support IPv6 yet so I am not loosing anything by disabling it on my adapter. When TigerVPN finally implements IPv6 support I expect that I can leave IPv6 enabled and not experience any issues. Time will tell.

NOTE: While we are on the subject of VPNs and IPv6 I would be remiss if I did not mention what is known as “IPv6 leak”. Very quickly “IPv6 leak” can happen if your VPN provider only supports IPv4 and not IPv6, and worse, just ignores any IPv6 traffic. If your ISP supports IPv6 and you get an IPv6 public address over which you can route traffic; that traffic will not be captured by your VPN provider (since they ignore it), and could thus “leak” and expose your identity, location and activities. Some VPN providers support what they call “IPv6 leak protection” where they still do not support IPv6, but when the VPN connections is established they insert black hole routes to all IPv6 destinations. I strongly recommend you find out exactly how your VPN provider handles IPv6 if you rely on VPNs to maintain your privacy (as you should).

M

More information:

Copying Azure Managed disks between regions

I recently had the need to copy some Azure managed disks to another region. Since managed disks are not backed by storage accounts like unmanaged disks, you cannot simply do a blob copy and be done. You have to copy your managed disk to a temporary storage account in your target region and create a managed disk from it.

I could not find something that did what I wanted, so I had to roll my own in the form of a PowerShell script. The script does the following:

  • Takes a source and target resource group, a target location, a set of managed disks and a target SKU as parameters. (Source and target resource groups can be the same.)
  • Creates a temporary storage account with a random name (mdcopynnnnn) in the target resource group in the target location. A new storage account is created each time the script runs.
  • Copies each disk into the target storage account using a blob copy with a SAS.
  • Creates new managed disk resources in the target resource group and target location, with the same names as the source disks.

Important notes:

  • Only supports OS disks for now, since I could not be bothered to write code to check if the disks are OS or data. Maybe later…
  • By default the target storage account is PremiumLRS, you can change this in the variables.
  • I use a 3600 seconds (1 hour) duration for the Shared Access Signature. If you think your disk takes longer to copy than that; increase the value in the variables.
  • There is a timeout, set to the same value as the SAS duration, so the script will continue after the copy has been going on for longer.
  • Assumes you have already logged into Azure and selected the correct subscription.
  • Only copies disks within the same subscription.
  • Assumes your target resource group already exists.
  • Neither deletes the temporary storage accounts or the source managed disks. I will not delete your data!
  • Hardly any error checking.
  • Absolutely no warranty whatsoever; use at your own risk!

https://gist.github.com/morgansimonsen/203983b7c52d1fce497c3a9fd4c24b21

M

A computer by any other name… would be better;how to change the hostname of a Windows 10 computer during setup

Introduction

Over the years the setup process for the Windows OS has been streamlined and optimized a lot. It used to be that you have to input a lot of information throughout the installation and the actual transferring of the OS files onto the hard drive took a long time. Now, the data copying has become a lot quicker by using things like imaging technology, and the user interaction during setup has been reduced to the bare necessities. So much so in fact, that I personally am now missing a few options that I could previously set. One of those is the computer name or hostname; the name you give your computer. In Windows 10 there is no question during setup what the computer should be called. Instead, Windows Setup automatically generates a name for you that looks something like this: DESKTOP-7KCPLCO. You can of course change this later using e.g. PowerShell’s Rename-Computer cmdlet. The problem is that the original name is often stored in the services you connect to, before you can actually change it. For example, when you join Azure AD during the Windows 10 Out-of-Box-Experience (OOBE), your machine is joined to Azure AD with the name that Windows Setup configured, and even if you change it later, it does not update in Azure AD. This is surely (hopefully) something that Microsoft will fix, so that it works the way it does in local Active Directory, where, if you change the name of a domain joined computer; the name in the directory also changes. But for now, that is not the case, and it can be quite a challenge keeping track of all those DESKTOP-<random number> machines.

The Fix

Luckily there is a workaround available. (In fact, there might be more than one workaround, but one was enough for me.) The one I made work was using the Windows unattended install support to supply a computer name during the specialize phase of Windows Setup. I basically configured an XML file that told Windows Setup which name to give the computer. Since there is no GUI prompt for this it all happens behind the scenes during your install. Using unattended setup of Windows is usually something that is only cost effective if you are going to install a bunch of machine over a long period of time, and it usually requires a lot of configuring a testing and things like driver packages, reference machines, distribution shares and in-depth knowledge of the Windows DISM utility. But in our case we need none of that, the only thing we want is a file with the name of the computer in it. This is how you set that up…

Unattend.xml

The file that holds all the information to install Windows 10 in a highly customized, hands-off fashion is called an answer file and is called unattend.xml by default. It is usually generated with the System Image Manager tool, which is part of the Windows Assessment and Deployment Toolkit (ADK). Hundreds of settings can be added to unattend.xml, but right now we only need the one for the name of the computer. This particular value is called ComputerName and is configured during the specialize phase of setup. Here is the entire chunk of XML you need to set the name of your computer using unattend.xml:

<?xml version="1.0" encoding="utf-8"?>
<unattend xmlns="urn:schemas-microsoft-com:unattend">
 <settings pass="specialize">
  <component name="Microsoft-Windows-Shell-Setup" processorArchitecture="amd64" publicKeyToken="31bf3856ad364e35" language="neutral" versionScope="nonSxS" xmlns:wcm="http://schemas.microsoft.com/WMIConfig/2002/State" xmlns:xsi="http://www.w3.org/2001/XMLSchema-instance">
   <ComputerName>ENTER YOUR DESIRED NAME HERE</ComputerName>
  </component>
 </settings>
</unattend>

You must enter you desired name in the ComputerName element, and also change processorArchitecture from amd64 to x86 if you are using this file to install the 32-bit version of Windows (which you shouldn’t). Remember to adhere to the rules for computer names, which you can find in the information about the ComputerName element provided above.

You need a removable drive

So how do we get Windows Setup to read our unattend.xml file during setup? When we do large deployments of Windows we usually have several XML files for different variations of installs, and they are specified using the deployment tools used. Luckily for us, we need nothing so complex here. Remember, we are talking about the occasional install of a few machines. Windows Setup is configured to implicitly look for an unattend.xml file in several locations when it starts. (It’s called implicit, because you can also explicitly provide an answer file using a command line parameter.) Windows Setup looks in a lot of places for unattend.xml, and also looks for other XML files to use with other phases of setup, but we don’t need to go into detail about that here. Setup will look for unattend.xml in the root of all RW/RO removable drives on the system, and this is by far the easiest method to achieve what we are trying to do here.

After you have configured your desired name in the piece of XML provided about, save it as unattend.xml, in the root of either the USB drive from which you are installing Windows, in the root of another USB drive, of even on a floppy disk (virtual or physical). As long as it is called unattend.xml, is in the root of the drive and the drive is of type removable, it will be picked up by Windows Setup. Start Windows setup as you normally would and wait until OOBE starts, then configure your computer like you want it. The setup process itself will not change and you will have no indication that the machine has been given another name until you can access the desktop and check for yourself. Once that happens you can use e.g. hostname.exe to see if your change was successful.

Note that since setup looks in several places for unattend.xml, it might find more than one. There is a search order and the answer file with the highest precedent is used. Make sure you know which one will be picked in your scenario and that you make your changes in that file.

Good luck!

BTW: I hope someone out there picked up on my attempt at Shakespeare-pun in the title of this post:

“A rose by any other name would smell as sweet”

 -Juliet in Act II, Scene II of Rome and Juliet


Fun with Bash on Ubuntu on Windows

Ever since the Windows Subsystem for Linux/Bash on Ubuntu on Windows feature in Windows 10 I have been playing around with it. Canonical, the makers of the Ubuntu Linux distribution, and Microsoft, made the Windows Subsystem for Linux (WSL) together, and it enables bash, which is the de facto default CLI shell on Linux, to run on Windows as a first class citizen. You no longer need things like Cygwin to run  bash and its command language and tools on your Windows 10 computer.Recently I did a little customizing to get a more genuine Ubuntu feeling on my Windows box. Specifically I wanted to make my Windows-based bash window look as much as the real thing as possible.

Windows has its own fonts for console windows, like Command Prompt (Consolas) and PowerShell (Lucida Console). But Ubuntu uses the Ubuntu Mono font for its console windows. Luckily for us the Ubuntu Font Family, of which Ubuntu Mono is a member, is freely available to anyone, in easy to install TTF format. To use it for your bash windows, download the package from the Ubuntu font site, extract its content and right-click each font file (.ttf) you want to install.

Screenshot (1)

Now, open your bash shell and edit its properties. In the Font list, select the newly installed Ubuntu Mono font:

Screenshot (2)

Granted, it’s not a huge difference between the default font and Ubuntu Mono, but the devil is in the details 🙂

Screenshot (3)

Screenshot (4)


Azure AD allows duplicate group names

You would expect that a service that is responsible for the naming of objects within a namespace should prohibit the creation of objects with the same leaf name and fully qualified name. Put simply you should not be able to have two files in the same directory with the exact same name in your file system. Likewise a directory service should do the same, or should it…?

It depends on the rules of the service actually, and what those rules specify must be unique. Take good old Windows Server Active Directory for example. Active Directory is based on LDAP and in the LDAP naming scheme an object may have the same Relative Distinguished Name (RDN), as long as the Distinguished Name (DN) is unique. In this case the RDN is the leaf name and the DN is the fully qualified name. So you can have two users named John Doe as long as they do not both reside within the same Organizational Unit (OU), or location, in the directory. So in AD the rules specify that the DN must be unique. There are also other rules like the ones that say no two users can have the same sAMAccountName or UserPrincipalName properties.

Azure Active Directory also has similar rules, for example you can’t create two AAD users with the same UPN (but they can have the same name). Azure AD groups act differently however. First of all they don’t have UPNs, they only have names (DisplayName attribute). So for groups the rules say that it is the ObjectID property of the group that must be unique, not the name. You can test this yourself easily with PowerShell. Run this command against your AAD tenant twice or more:

New-MsolGroup -DisplayName "GroupWithTheSameName"

It will succeed and you are left with a number of groups which look identical until you look at their ObjectID properties. I’m sure you can imagine the interesting side-effects of having more than one group with the same name… How is this allowed you ask?

The answer is hybrid identity. Azure AD and it’s local sync component; Azure AD Connect, supports syncing users and groups from multi-domain forests and multiple disparate forests into the same Azure AD tenant. This is great for consolidation scenarios, but to understand exactly how it relates to duplicate group names in Azure AD; let’s look at the rules for uniqueness in Active Directory again:

  • Single forest
    • Users must have a unique UPN attribute within a forest, and a unique sAMAccountName attribute within the domain. No such requirement exists between forests. The RND can be the same as long as the DN is unique.
    • Groups must have unique sAMAccountName attributes within a domain. No such requirement exists between forests. The RND can be the same as long as the DN is unique.

The mechanism within a forest that makes sure the above requirements are met is the global catalog (GC).

  • Multi forest
    • Anything goes, nothing is shared between forests, even forests that trust each other. You could even have two forests with the same forest root name and UPN suffixes. There would not be able to interact with each other of course.

Form this we see that we can have groups that have the same name, they are only separated by their sAMAccountName attributes in Active Directory. Azure AD Connect does not synchronize the sAMAccountName into Azure AD so we get duplicate groups.

At this point you may be wondering what happens if you have two disparate forests with the same forest root name, how will they sync? Answer is they won’t, that is not a supported scenario by Azure AD Connect, which uses DNS to find the DCs of the forests.

You may also be wondering why this does not apply to users. Users have a unique attribute that is synced into Azure AD; the UPN. As long as it is unique within the forest the user will sync to Azure AD. If you have two forests with the same UPN for two or more users, but still are able to be part of the same Azure AD Connect sync installation, something which is possible if you configure the same UPN suffix in both forests, Azure AD connect will block the syncing when it encounters these users.

NOTE: Manipulating Active Directory directly it is actually possible to have two users with the same UPN in the same domain or forest. If you try to sync those users into Azure AD they will be blocked like described above.

The good news regarding groups is that Microsoft are working on a way to handle groups better in Azure AD Connect so that we do not get these duplicates.

Always fun with a little directory service internals 🙂

How to configure SAML SSO with the Cisco Meraki Dashboard and Azure Active Directory

Introduction

The fine people at Cisco Meraki have recently enabled SAML SSO support to their Meraki Dashboard service. For those of you who don’t know Meraki is Cisco’s cloud managed networking solution. Basically you manage all your networking equipment from a web portal. For more information about Meraki, go here.

Whenever I start using a new web application, which is what the Meraki Dashboard is, I always look for options to integrate it with my existing identity platform, which in my case is Azure AD. The benefits of doing this should be apparent and are not in the scope of this post, but basically I want to control access to all applications with one identity and thus limit the numbers of logons I have to maintain.

Note: Let me just mention that at the time of writing; the SAML SSO feature of the Meraki Dashboard is in Beta.

So let’s look at how we can now integrate Azure AD and Meraki.

Setup

Meraki have provided their own documentation on how to set up SAML SSO with either ADFS or OneLogin, this documentation is available here. But we want to use Azure AD.

Configure SSO

In this section we complete the basic SSO setup.

  1. First enable SAML SSO for your organization. Just enable it for now and press Save.
    merakisamlsso1
  2. Go to the Azure portal and add a new application to your Azure AD tenant. Select to add an application from the gallery and then select Custom. Name your application something like Meraki Dashboard:
    merakisamlsso2
  3. On the page of your newly created application select Configure single sign-on.
  4. Select Microsoft Azure AD Single Sign-On as the sign on method.
  5. For your application identifier and reply URL enter https://dashboard.meraki.com.
    merakisamlsso3
    NOTE: We will change the value of the Reply URL in the following steps.
  6. Download the certificate in Base 64 format and open it.
    merakisamlsso4
  7. On the Details tab, find the certificate thumbprint and copy it.
  8. Go back to the Meraki Dashboard and paste the thumbprint value into the X.509 cert SHA1 fingerprint field. You must replace all spaces with colons. Hit Save. You should now have a Consume URL displayed, it will look something like this:
    https://n150.meraki.com/saml/login/<unique ID>. Copy this value, we need it later. Enter the URL of the Azure AD MyApps portal in the SLO logout URL field. Your complete configuration should now look something like this:
    merakisamlsso5
    The logout URL is where the Meraki Dashboard will redirect users when they sign out, this location should be where they can sign in again, which in this case is the MyApps portal.
  9. Go back to the Azure AD portal and go back one step in the Configure Single Sign-On wizard to enter this value into the Reply URL box. Reply URL is also known as Assertion Consumer Service (ACS) and is where the application expects the authentication response from the IdP. Your final settings should look like this:
    merakisamlsso6
  10. Advance to the page of the wizard where you downloaded the certificate and check the box labelled Confirm that you have configured single sign-on as described above. Checking this will enable the current certificate to start working for this application.
  11. Finish the Configure Single Sign-On wizard.

Configure SAML Roles in your Meraki organization

Now we need to configure roles in Meraki Dashboard to control the level of access that SSO users get. You can configure many roles and granular network access here, but we will create only one role.

  1. Go to the Meraki Dashboard and navigate tot Organization\Administrators.
  2. Find the SAML administrator roles section and select Add SAML role
  3. Name the new role Organization and set organization access to full, do not select any target networks:
    merakisamlsso7

Configure Claims

In this section we configure the claims that the Meraki Dashboard needs to work. Currently Meraki Dashboard requires a username and a role claim, issued using their naming standard.

  1. In the Azure AD portal, go to the Attributes tab of the Meraki Dashboard application.
  2. Add the following attributes:

Attribute name: https://dashboard.meraki.com/saml/attributes/username

Attribute value: user.userprincipalname

Type: User attribute

Attribute name: https://dashboard.meraki.com/saml/attributes/role

Attribute value: Organization

Type: Constant

Feel free to delete any claims you don’t want to send to the Meraki Dashboard.

Configure Access to the Meraki Dashboard application

In this scenario we use Azure AD as the control plane for who gets the Organization role we specified earlier. We do this by assigning the Meraki Dashboard application to the specific users we want to be organization admins.

  1. In the Azure AD portal select the Users and Access tab of the Meraki Dashboard application
  2. Select Show: All Users in the drop down box.
  3. Select the users you want to be organization admins and hit Assign at the bottom of the page.

About Roles in this setup

As you can see from the above configuration, all users that are assigned the Meraki Dashboard application will get full Organization access, based on the role we created This is almost certainly not what you want, but this is just an example. In the Meraki guide for ADFS we see that they use Active Directory groups to select which role is passed in the claim. Unfortunately, the logic to do this is not available in Azure AD at the moment. You cannot select a claim value based on a group. What you can do instead is use a free attribute in either your local Active Directory or Azure AD to specify the name of the Meraki role to give the user. To accomplish this you must first map out all the Meraki roles you need and then provide the names of these roles in the role claim, based on the value of the attribute.

Testing access

Now let’s see if it worked.

  1. Log in to the Azure AD MyApps portal as one of the users that you assigned to the Meraki Dashboard application; https://myapps.microsoft.com.
  2. Meraki Dashboard show now show up as an available application:
    merakisamlsso8
  3. Hit the icon and you should now be forwarded to the Meraki Dashboard.
  4. Notice that your username at the top is now your User Principal Name from Azure AD.
  5. Navigate to Organization\Administrators and hit SAML login history. This will display all SAML logins to the dashboard. Your login should show up here. You can also press the value in the timestamp and you will see more details, and you can even view the entire XML assertion.

Further customization

Hopefully everything is working for you. If you want to further customize this setup you could for example add a logo to your app and remove the claims not needed by the Dashboard. You now also have access to all the advanced access policies of Azure AD and can add MFA and location based access rules and provide delegated self-service access.

Notes about the setup

There are a few things to note about the Meraki SSO support in general and this setup in particular.

  • Meraki Dashboard currently only supports Identity Provider (IdP) initiated sign-on. This means you have to start in the Azure MyApps portal, log in, and then proceed to the Meraki Dashboard by pressing the icon. Going to the dashboard first and trying to log in with an ID from Azure AD (or any IdP) will not work. This last scenario is what is known as Service Provider Initiated sign-on (SPinit). (I’m thinking you should be able to create a smart URL here, but have not have time to test that yet.)
  • If the username of the admin that signs in with SSO is already registered as a regular dashboard admin the sign in will fail.
  • There is already a pre canned Cisco Meraki Dashboard app in the Azure AD application gallery, but this only supports password SSO, which means that you will have to enter your regular Dashboard account login details into the Azure AD credentials vault and then have Azure AD forward those credentials when users sign in. This is not true SSO. However, I recommend you harvest the icons from this app and use in the one you create. (The URL of the logo is: https://az495088.vo.msecnd.net/app-logo/merakidashboard_215.png)

More information

For more information on Meraki Dashboard permissions and administrator types, refer to the article on managing administrative users

Information wants to be free!