Introduction
The fine people at Cisco Meraki have recently enabled SAML SSO support to their Meraki Dashboard service. For those of you who don’t know Meraki is Cisco’s cloud managed networking solution. Basically you manage all your networking equipment from a web portal. For more information about Meraki, go here.
Whenever I start using a new web application, which is what the Meraki Dashboard is, I always look for options to integrate it with my existing identity platform, which in my case is Azure AD. The benefits of doing this should be apparent and are not in the scope of this post, but basically I want to control access to all applications with one identity and thus limit the numbers of logons I have to maintain.
Note: Let me just mention that at the time of writing; the SAML SSO feature of the Meraki Dashboard is in Beta.
So let’s look at how we can now integrate Azure AD and Meraki.
Setup
Meraki have provided their own documentation on how to set up SAML SSO with either ADFS or OneLogin, this documentation is available here. But we want to use Azure AD.
Configure SSO
In this section we complete the basic SSO setup.
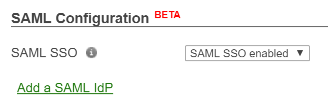
- First enable SAML SSO for your organization. Just enable it for now and press Save.
- Go to the Azure portal and add a new application to your Azure AD tenant. Select to add an application from the gallery and then select Custom. Name your application something like Meraki Dashboard:

- On the page of your newly created application select Configure single sign-on.
- Select Microsoft Azure AD Single Sign-On as the sign on method.
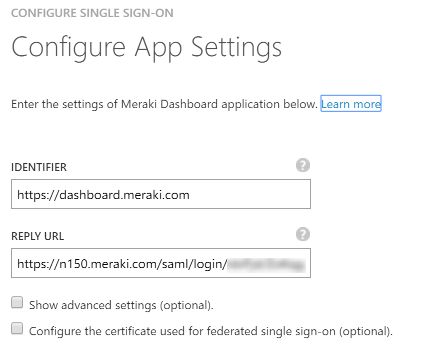
- For your application identifier and reply URL enter https://dashboard.meraki.com.
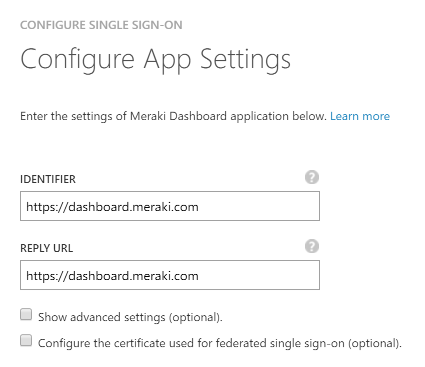
NOTE: We will change the value of the Reply URL in the following steps. - Download the certificate in Base 64 format and open it.
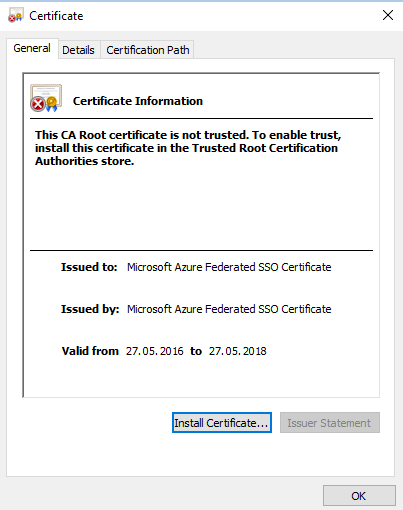
- On the Details tab, find the certificate thumbprint and copy it.
- Go back to the Meraki Dashboard and paste the thumbprint value into the X.509 cert SHA1 fingerprint field. You must replace all spaces with colons. Hit Save. You should now have a Consume URL displayed, it will look something like this:
https://n150.meraki.com/saml/login/<unique ID>. Copy this value, we need it later. Enter the URL of the Azure AD MyApps portal in the SLO logout URL field. Your complete configuration should now look something like this:
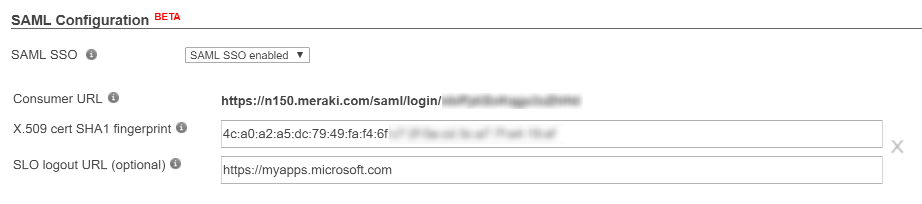
The logout URL is where the Meraki Dashboard will redirect users when they sign out, this location should be where they can sign in again, which in this case is the MyApps portal. - Go back to the Azure AD portal and go back one step in the Configure Single Sign-On wizard to enter this value into the Reply URL box. Reply URL is also known as Assertion Consumer Service (ACS) and is where the application expects the authentication response from the IdP. Your final settings should look like this:
- Advance to the page of the wizard where you downloaded the certificate and check the box labelled Confirm that you have configured single sign-on as described above. Checking this will enable the current certificate to start working for this application.
- Finish the Configure Single Sign-On wizard.
Configure SAML Roles in your Meraki organization
Now we need to configure roles in Meraki Dashboard to control the level of access that SSO users get. You can configure many roles and granular network access here, but we will create only one role.
- Go to the Meraki Dashboard and navigate tot Organization\Administrators.
- Find the SAML administrator roles section and select Add SAML role
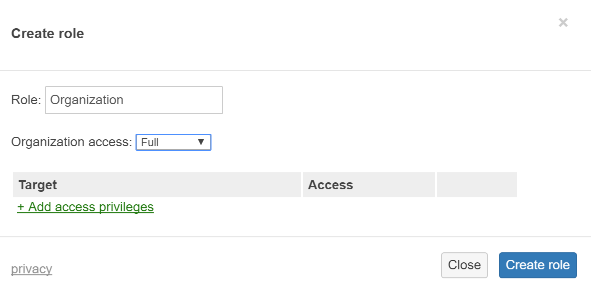
- Name the new role Organization and set organization access to full, do not select any target networks:
Configure Claims
In this section we configure the claims that the Meraki Dashboard needs to work. Currently Meraki Dashboard requires a username and a role claim, issued using their naming standard.
- In the Azure AD portal, go to the Attributes tab of the Meraki Dashboard application.
- Add the following attributes:
Attribute name: https://dashboard.meraki.com/saml/attributes/username
Attribute value: user.userprincipalname
Type: User attribute
Attribute name: https://dashboard.meraki.com/saml/attributes/role
Attribute value: Organization
Type: Constant
Feel free to delete any claims you don’t want to send to the Meraki Dashboard.
Configure Access to the Meraki Dashboard application
In this scenario we use Azure AD as the control plane for who gets the Organization role we specified earlier. We do this by assigning the Meraki Dashboard application to the specific users we want to be organization admins.
- In the Azure AD portal select the Users and Access tab of the Meraki Dashboard application
- Select Show: All Users in the drop down box.
- Select the users you want to be organization admins and hit Assign at the bottom of the page.
About Roles in this setup
As you can see from the above configuration, all users that are assigned the Meraki Dashboard application will get full Organization access, based on the role we created This is almost certainly not what you want, but this is just an example. In the Meraki guide for ADFS we see that they use Active Directory groups to select which role is passed in the claim. Unfortunately, the logic to do this is not available in Azure AD at the moment. You cannot select a claim value based on a group. What you can do instead is use a free attribute in either your local Active Directory or Azure AD to specify the name of the Meraki role to give the user. To accomplish this you must first map out all the Meraki roles you need and then provide the names of these roles in the role claim, based on the value of the attribute.
Testing access
Now let’s see if it worked.
- Log in to the Azure AD MyApps portal as one of the users that you assigned to the Meraki Dashboard application; https://myapps.microsoft.com.
- Meraki Dashboard show now show up as an available application:
- Hit the icon and you should now be forwarded to the Meraki Dashboard.
- Notice that your username at the top is now your User Principal Name from Azure AD.
- Navigate to Organization\Administrators and hit SAML login history. This will display all SAML logins to the dashboard. Your login should show up here. You can also press the value in the timestamp and you will see more details, and you can even view the entire XML assertion.
Further customization
Hopefully everything is working for you. If you want to further customize this setup you could for example add a logo to your app and remove the claims not needed by the Dashboard. You now also have access to all the advanced access policies of Azure AD and can add MFA and location based access rules and provide delegated self-service access.
Notes about the setup
There are a few things to note about the Meraki SSO support in general and this setup in particular.
- Meraki Dashboard currently only supports Identity Provider (IdP) initiated sign-on. This means you have to start in the Azure MyApps portal, log in, and then proceed to the Meraki Dashboard by pressing the icon. Going to the dashboard first and trying to log in with an ID from Azure AD (or any IdP) will not work. This last scenario is what is known as Service Provider Initiated sign-on (SPinit). (I’m thinking you should be able to create a smart URL here, but have not have time to test that yet.)
- If the username of the admin that signs in with SSO is already registered as a regular dashboard admin the sign in will fail.
- There is already a pre canned Cisco Meraki Dashboard app in the Azure AD application gallery, but this only supports password SSO, which means that you will have to enter your regular Dashboard account login details into the Azure AD credentials vault and then have Azure AD forward those credentials when users sign in. This is not true SSO. However, I recommend you harvest the icons from this app and use in the one you create. (The URL of the logo is: https://az495088.vo.msecnd.net/app-logo/merakidashboard_215.png)
More information
For more information on Meraki Dashboard permissions and administrator types, refer to the article on managing administrative users