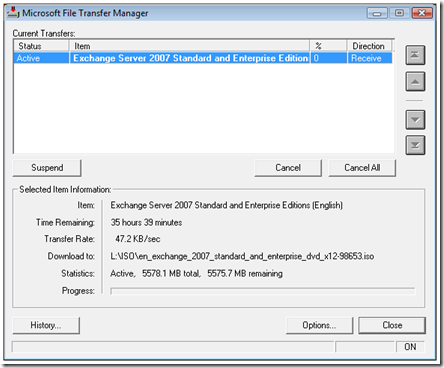
Everyone downloading from MSDN, the MCT Download Center or any other semi-open Microsoft download site, is familiar with the Microsoft File Transfer Manager application. It is a rather nice utility that is installed on your machine the first time you start a download from one of the sites I mentioned. It supports queuing and resume of downloads. As I said; nice.
It has, however, a rather nasty habit of disappearing once you close it. This makes it hard to resume your downloads if they did not finish, and to view your download history. The only way (well, not really, but more on that later) to start it again is to visit one of the Microsoft download sites and start a new download. Then it will launch again and you can examine the command line in Process Explorer and find where it is stored so that you can launch it again later without having to start a download. Or not…
I have gone through this exercise many times and I know where the FTM is installed, or at least I used to know, back when I was running Windows XP. Then it was something like c:windowsMicrosoft File Transfer Manager. But now I am running Vista, and it’s not at that location any more. I set out to find it, I mean, how hard could it be?
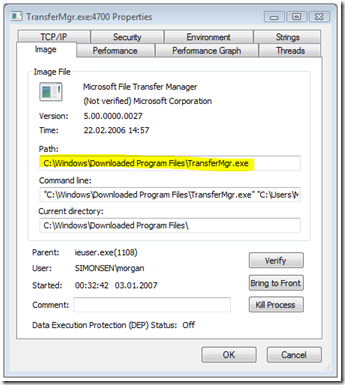
First I searched the machine for a filename containing trans, using Windows Desktop Search which is integrated into Windows Vista. No matches. Then I tried some variations on the filename; still nothing. So now I started looking in the Program Files and Windows directories trying to find it using empirical observation. Meaning that I manually looked in each folder in those directories. Still nothing. This was getting frustrating so I signed in to MSDN and started a new download. After the FTM started I checked it’s command line in Process Explorer:
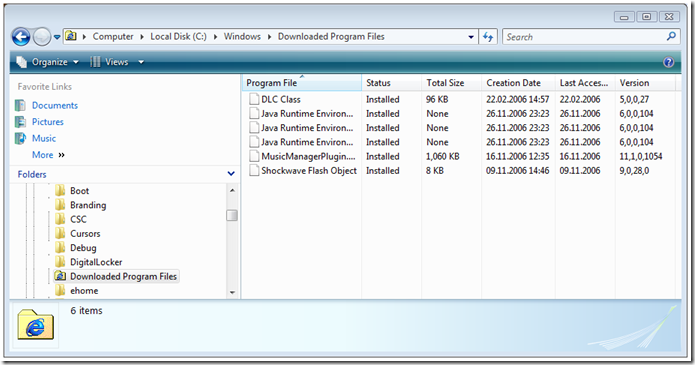
And there it was; in c:windowsDownloaded Program FilesTransferMgr.exe. Success! So now let’s go there and make a shortcut on the desktop so that I have it ready next time I need it. This is how that folder looks in Explorer (with ‘show hidden and system files’ turned on):
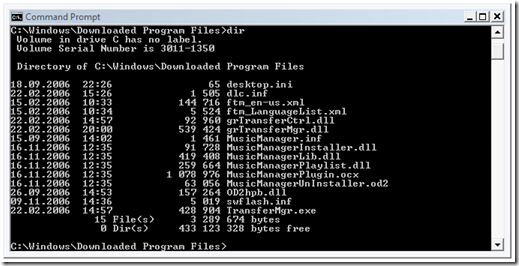
This was getting really frustrating. Switching to my old friend, the command line I got some more info:
Finally I could see all the files. Now how do you make a shortcut from the command line? That’s right, you can’t (at least I don’t know how). So that left me with trying to view the actual files present in the Downloaded Program Files directory in Explorer, where I could create a shortcut.
A folder’s layout in Windows is controlled by a file called desktop.ini. It is present in almost all directories on a Window system and controls everything from the icon of the folder, it’s name and localized name. You can do some cool stuff with desktop.ini, but that is beyond this post. My guess was that it was the desktop.ini file that was responsible for the limited view I could see in Explorer. So let’s get rid of it.
C:WindowsDownloaded Program Files>del desktop.ini
Access is denied.
OK. So what are the file permissions?
C:WindowsDownloaded Program Files>cacls desktop.ini
C:WindowsDownloaded Program Filesdesktop.ini NT SERVICETrustedInstaller:F
BUILTINAdministrators:R
NT AUTHORITYSYSTEM:R
BUILTINUsers:R
The only account that has Full Control permission to the desktop.ini file is the NT SERVICETrustedInstaller principal. So who is the owner?
subinacl.exe /file “c:windowsDownloaded Program Filesdesktop.ini” /display=owner
+File c:windowsDownloaded Program Filesdesktop.ini
/owner =trustedinstaller
Again, the NT SERVICETrustedInstaller principal.
Note: subinacl is not included in any Windows version and must be downloaded from the Microsoft Download site. It is included in the Windows Server 2003 Resource Kit, but that version does not work.
Note: You must run the above command from an elevated command prompt.
So let’s take ownership of the file, then we can change the permissions and delete it:
subinacl.exe /file “c:windowsDownloaded Program Filesdesktop.ini” /setowner=Morgan
c:windowsDownloaded Program Filesdesktop.ini : simonsenmorgan is the new owner
c:windowsDownloaded Program Filesdesktop.ini : 1 change(s)
And change it’s permissions so that we can delete or rename it:
cacls “c:WindowsDownloaded Program Filesdesktop.ini” /G simonsenmorgan:F /E
Make a backup:
copy desktop.ini c:Usersmorgan.SIMONSENDownloadsdesktop.ini.bak
And finally delete it:
del desktop.ini
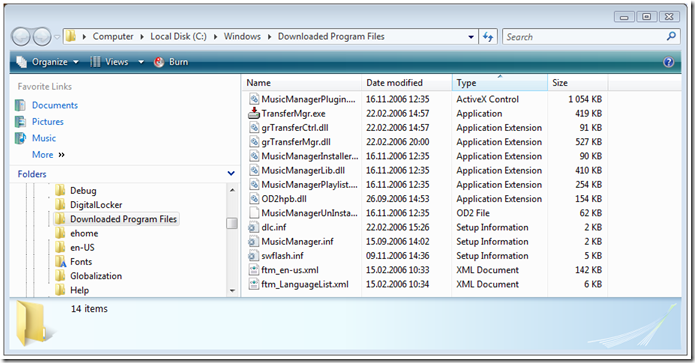
Now the view in Explorer is quite different:
Note: You have to close Explorer if it was open during the desktop.ini manipulation. Otherwise the customizations in desktop.ini are cached and remain in effect.
Now I could finally create a shortcut on my desktop:
Puh, what an operation!
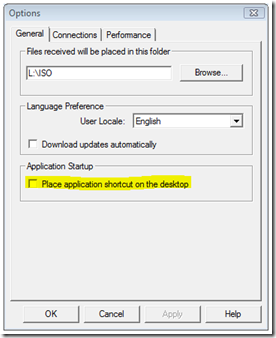
Now for the real killer. This was all a waste of time! Remember that I said the only way to launch the FTM was to visit a Microsoft download site and start a new download? Well, once the FTM is running you can click on the Options button, and you see this:
D’oh!
Actually I knew that the option was there. Trying to save time, my first attempt was just to try to locate it in the file system and then launch it and click the option. But then I couldn’t and as I started investigating I discovered some interesting stuff about Windows Vista and that made it all worth while.
By the way, if you are trying this on your own system, you can set the system back to it’s default state with these commands:
copy c:Usersmorgan.SIMONSENDownloadsdesktop.ini.bak .desktop.ini
cacls desktop.ini /R simonsenmorgan /E
subinacl.exe /file “c:windowsDownloaded Program Filesdesktop.ini” /setowner=”NT SERVICEtrustedinstaller”
You, of course, have to replace my paths with your own.
Now for some sleep!
